
There is nothing quite like the magic of watching a tiny beak pip through an eggshell. Hatching your own chicks is an incredibly rewarding experience, whether you are expanding your backyard flock or teaching your kids about the cycle of life.
However, it also requires precision, patience, and a bit of specialized gear. Mother Nature makes it look easy, but when you are playing the role of the mother hen, you have to get the details exactly right.
Here is your straightforward, step-by-step guide to successfully hatching chicks at home.
1. Gather Your Gear
Before you even think about getting eggs, you need the right environment set up and stabilized.
-
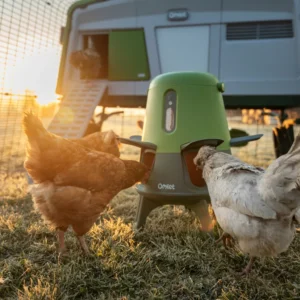
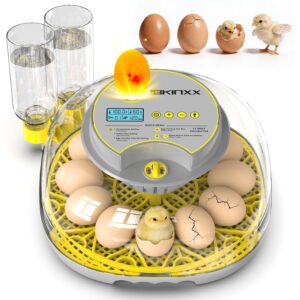
An Incubator: This is your artificial mother hen. You can buy manual ones (where you turn the eggs by hand) or fully automatic ones (which control temperature, humidity, and turning). For beginners, an automatic incubator is highly recommended. [AFFILIATE LINK: Incubator]
-
Thermometer and Hygrometer: Even if your incubator has built-in sensors, buy an independent, calibrated thermometer and hygrometer (to measure humidity) to double-check the readings. Accuracy is life or death for developing embryos. [AFFILIATE LINK: Thermometer/Hygrometer]

-
Egg Candler: A specialized, high-intensity flashlight used to look inside the egg to check for development.
2. Sourcing Fertile Eggs
You cannot hatch the eggs you buy at the grocery store—they are not fertilized! You need fertile eggs from a flock that includes a rooster.
-
Local Farmers: The best option. Local eggs haven’t been jostled in the mail, which significantly increases hatch rates.
-
Online Hatcheries or Breeders: A great way to get specific or rare breeds. Let shipped eggs rest point-down at room temperature for 12 to 24 hours before putting them in the incubator to let the air cells settle.
3. The 21-Day Incubation Journey
Chicken eggs take 21 days to hatch. During this time, you are managing three crucial elements: temperature, humidity, and movement.
The Ideal Environment
| Stage | Days | Temperature | Humidity | Egg Turning |
| Incubation | 1 to 17 | 99.5°F (37.5°C) | 45% – 50% | Yes (At least 3-5 times a day) |
| Lockdown | 18 to 21 | 99.5°F (37.5°C) | 65% – 70% | NO |
Candling the Eggs
On Day 7 and Day 14, take your candler into a dark room and shine it through the large end of each egg.
-
Day 7: You should see a dark spot (the eye) and a spiderweb of red blood vessels.
-
Day 14: The egg will be mostly dark because the chick takes up most of the space.
-
Note: Discard any eggs that are completely clear (infertile) or have a distinct red “blood ring” (which indicates the embryo died early on) so they don’t rot and contaminate the incubator.
4. Days 18-21: “Lockdown”
Day 18 is when you prepare for the main event.
-
Stop Turning: The chick is moving into the final hatching position. Turning them now will disorient them.
-
Raise the Humidity: Bump it up to 65-70%. This prevents the membrane inside the egg from “shrink-wrapping” the chick once they pip a hole in the shell.
-
Do Not Open the Lid: Every time you open the incubator, you lose precious heat and humidity. Keep it closed!
5. Hatch Day!
On or around Day 21, you will see a small crack or hole appear on the eggshell. This is called a “pip.”
The Golden Rule of Hatching: Be Patient and DO NOT HELP. It can take anywhere from 12 to 24 hours from the first pip to a fully hatched chick. They rest for long periods during this process to absorb the remaining yolk sac, which will sustain them for their first 48 hours of life. Helping a chick out of its shell too early can cause fatal bleeding or leave their yolk unabsorbed.
6. Moving to the Brooder
Once the chicks have hatched, leave them in the incubator until they are completely dry and fluffy (this can take up to 24 hours). Opening the incubator while other eggs are still hatching will drop the humidity and endanger the unhatched chicks.
Once they are dry, move them to a pre-warmed brooder box.
Your brooder needs:
-
A heat lamp or heating plate (starting at 95°F and lowering by 5°F each week).
-
Pine shavings for bedding (never cedar).
-
Chick starter feed.
-
A shallow waterer (add marbles or pebbles to the water so the tiny chicks don’t accidentally drown).

Hatching chicks requires diligence, but seeing that first fluffy chick dry off and start exploring its new world makes all the temp-checking and humidity-adjusting entirely worth it.