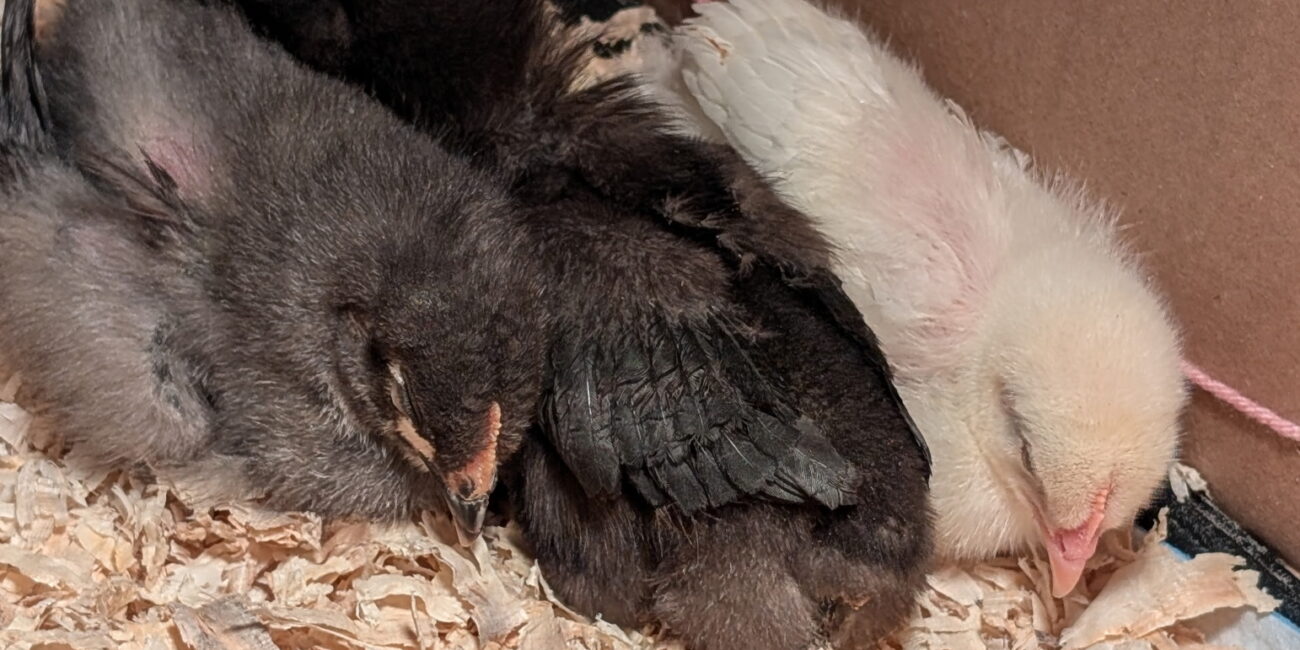
After the high of watching that first “pip” and “zip,” nothing grounds a chicken keeper faster than noticing a chick that isn’t quite right. While many chicks emerge perfectly, sometimes nature needs a little help—or at least a little extra care.
Dealing with birth defects can be heart-wrenching, but as homesteaders, it’s our job to troubleshoot and provide the best life possible for our flock. Here is a guide to the most common chick birth defects and how to manage them.
1. Splayed Leg (Spraddle Leg)
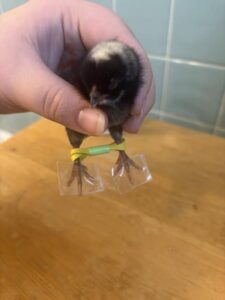
This is perhaps the most common issue. The chick’s legs slide out to the sides (like they are doing the splits), making it impossible for them to stand or walk. This is often caused by slippery floors in the incubator or brooder, or temperature fluctuations during incubation.
-
How to fix it: If caught early (within the first 24–48 hours), this is very fixable. You need to create a “hobble” or brace to hold the legs in the correct position so the bones and muscles can strengthen properly.
-
The DIY Hack: Use a small piece of Vet Wrap or a hair elastic with two straws to keep the legs parallel. They should be spaced about a “natural” width apart. Most chicks only need the brace for 2–4 days.
2. Curled Toes
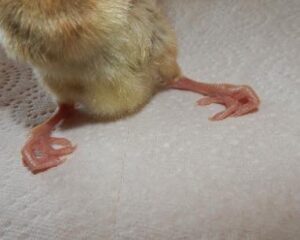
Curled toes can look like the chick is walking on its knuckles. This is usually caused by incubation temperatures that were slightly too high or a riboflavin (Vitamin B2) deficiency in the parent hen.
-
How to fix it: You can create “chick shoes.” Use a piece of stiff cardboard or a heavy-duty band-aid cut to the shape of the chick’s foot. Gently spread the toes out and tape them to the “shoe.”
-
Support: Adding a poultry-specific vitamin and electrolyte powder to their water can help if the cause was nutritional. [AFFILIATE LINK – Chicken Vitamins, Electrolytes, and Probiotics]
3. Scissor Beak (Crossbeak)
Crossbeak is a condition where the top and bottom halves of the beak do not align, making it difficult for the bird to grasp food. This is often genetic or caused by a malposition in the egg.
-
Can it be fixed? Generally, no. It is a skeletal deformity that often worsens as the bird grows.
-
How to manage it: Many crossbeak chickens live long, happy lives with accommodations. Use deep food bowls so they can “scoop” their food rather than pecking at a flat surface. Wetting the feed into a “mash” or “oatmeal” consistency makes it much easier for them to eat.
4. Wry Neck (Stargazing)
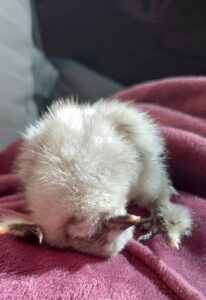 A chick with wry neck cannot hold its head up; it may tuck its head between its legs or look straight up at the sky. It looks scary and neurological, but it is often a simple vitamin deficiency (specifically Vitamin E and Selenium).
-
How to fix it: Supplementation is key. You can find Vitamin E capsules (squeeze the liquid out) and Selenium supplements at most farm supply stores. [AFFILIATE LINK – Selenium and Vitamin E Powder]
-
Care: You will need to hand-feed and water the chick until they can hold their head steady, as they cannot find the feeder on their own.
5. Unabsorbed Yolk Sac or Omphalitis
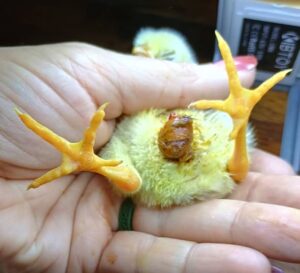
Sometimes a chick hatches with a yellow, soft mass protruding from its navel. This is the yolk sac that hasn’t been fully absorbed. If the area becomes red or inflamed, it’s known as Omphalitis (Mushy Chick Disease).
-
The Management: This is a high-risk situation. Keep the chick in a very clean, separate “hospital” brooder on paper towels (not shavings, which can stick to the navel).
-
The Rule: NEVER try to squeeze or pop the sac. If it’s small, the chick may absorb it over the next 24 hours. If it’s large or leaking, the prognosis is unfortunately poor.
A Note on “The Hard Choice”
As much as we want to save every fluffball, part of responsible flock management is knowing when a chick is suffering. If a chick cannot eat, drink, or move even after 48 hours of intervention, culling may be the most humane option. It’s the hardest part of the job, but it ensures your flock stays healthy and strong.
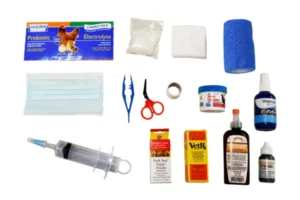
Frugal Tip: Keep a “Chick First Aid Kit” ready before you hatch. Having Vet Wrap, vitamins, and medical tape on hand saves you a frantic trip to the store while a chick is struggling. [AFFILIATE LINK – Chicken First Aid Kit]